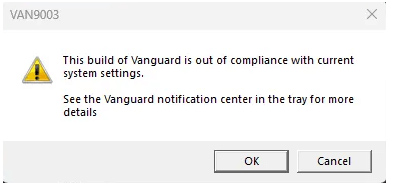
Troubleshoot the Valorant VAN9003 Error: Riot Games created the 5v5 tactical-based Valorant FPS game. You receive one life for every round you defend or attack with weapons and skills. But following the recent 5.12 update, several players reported the Valorant VAN9003 error, followed by another error that states, “This build of Vanguard is out of conformity with current system settings.”
It is followed by the instruction, ” See the Vanguard Notification center in the tray for further details.”

A similar error displaying VAN9003, “Initial Attestation Failure Secure Boot Requirement Not Met,” has also been reported by several users. If you are experiencing a similar problem with your Valorant, this troubleshooting guide is for you.
Follow the easy yet effective techniques below to resolve the Valorant VAN9003 error on your Windows devices. But before we get to the answer, it’s vital to understand what’s causing the VAN9003 error.
What does Valorant VAN9003 Error Signifies?
The error might occur when secure boot is not enabled on your device. Windows trusted features such as secure boot, Trusted Platform Module, and so on assist your system in safely booting apps or programs. As a result, Vanguard requires these two applications, Trusted Platform Module and Secure Boot, to ensure that the system is secure.
Check to see whether the BIOS Mode is set to UEFI. Secure Boot State is also enabled. If these settings do not match, proceed with the procedures below to activate the Secure boot state on your PC.
Valorant VAN9003 Error: Quick Fixes
To resolve the VAN9003 error on your device, use the following remedies.
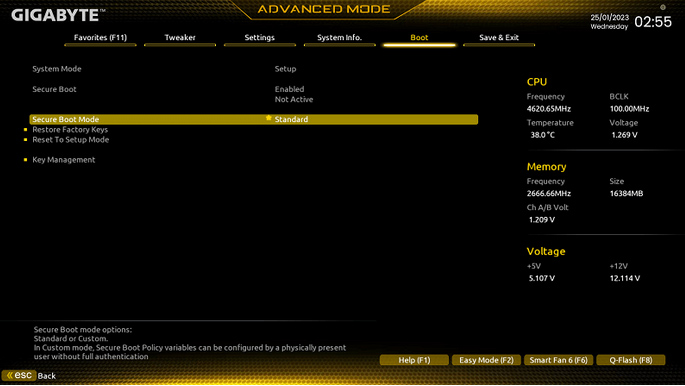
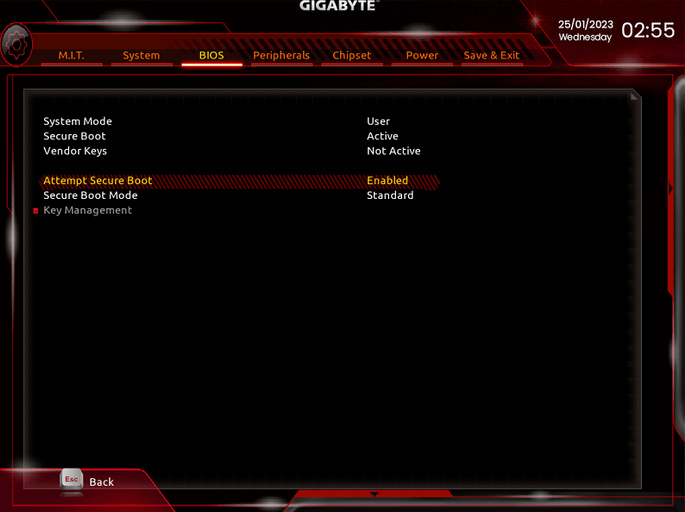
Solution 1: Enable Secure Boot.
Apply the instructions below to resolve the VAN9003 error on your device by activating Secure Boot on your PC.
1. Restart your computer and enter BIOS mode using the F2 key.
2. If you are using
Dell Inspiron, Dell Vostro, and Alienware: Change Secure Boot to Enable by clicking on Secure Boot. To save, hit F10 and then quit.
OptiPlex, Wyse, XPS, and Precision: Open Secure Boot and choose to Enable Secure Boot. Check to see whether Secure Boot is enabled. Next, click Apply, then Exit, and finally, Save.
Wait for your computer to restart after applying and saving these modifications. Then, if the Valorant VAN9003 error continues, proceed to the next Fix to cure the problem.
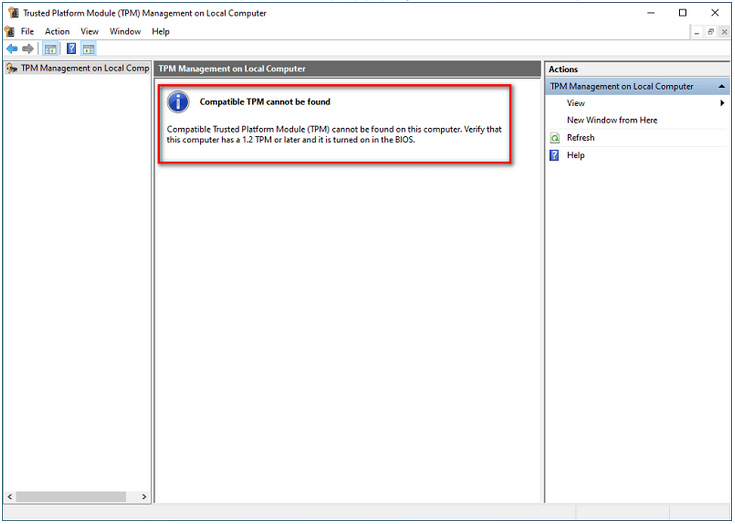
Solution 2: Enable TPM
To resolve the Valorant error, you must first determine whether TPM is enabled. Here’s how to do it. To launch the Run dialogue box, press the Windows and R keys simultaneously. Enter tpm.msc and press OK. If the TPM version is less than 2.0, your system will prompt you to upgrade.
You must enable TPM in your BIOS by following the procedures outlined below to accomplish this.
1. Restart your Windows 11 device and enter BIOS by pressing F10, F11, F12, or Delete (depending on your motherboard manufacturer).
2. Using the arrow keys, browse to TPM status or PTT, fTPM in Advanced BIOS mode.
3. Select Enable and press the Enter key on your keyboard.
4. Save your settings and exit BIOS mode. Restart your computer to see whether the game error has been resolved.
Start the game Valorant to see if the VAN9003 error has been fixed.
Conclusion
We hope that the information in this post has helped you resolve the Valorant VAN9003 error. In most situations, activating Secure Boot mode fixes the problem. However, if you have further questions, please express them in the comments below. We will do our best to solve the issue with the appropriate solution.
Also, if you found this tutorial useful, please subscribe to our blog for more helpful troubleshooting instructions and tech updates.


