
PC gamers encounter an issue where, when playing any game on their Windows 11 computer, they encounter a fault that causes the game to cease abruptly in mid-flight. The error message that follows is DXGI_ERROR_DEVICE_REMOVED. The DXGI ERROR DEVICE REMOVED occurs when your computer’s graphics card isn’t working correctly, or there’s a connectivity problem. Suppose this is a problem for you. There are fixes for the problem that is also relatively straightforward and are discussed in this post.
DXGI_ERROR_DEVICE_REMOVED Error? How To Fix
Update Graphics Driver
Before using this fix, you must update your graphics card drivers. The Optional Updates area of Windows Update is where you can find the newest graphics driver updates or manually update them using the Device Manager. In addition, the manufacturer of your video card’s hardware provides a website to get the most recent driver.
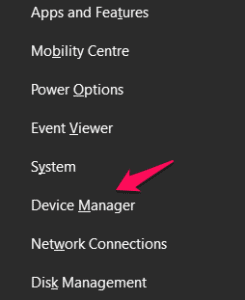
1 – Navigate to the start menu and enter Device manager.
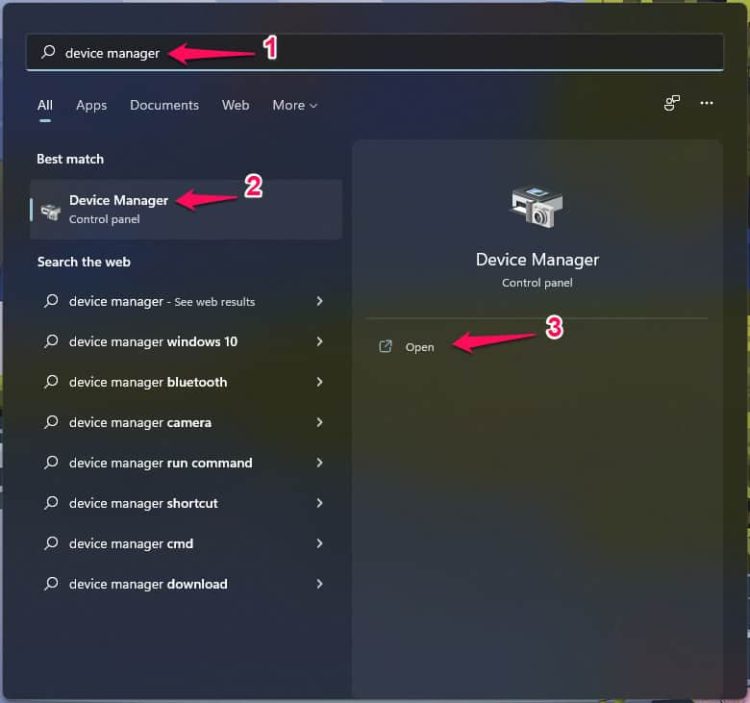
2 – Open the device manager.
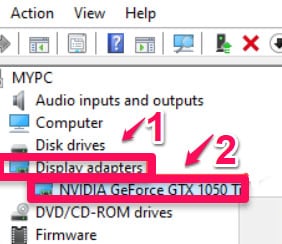
3 – Extend Display Adapters.
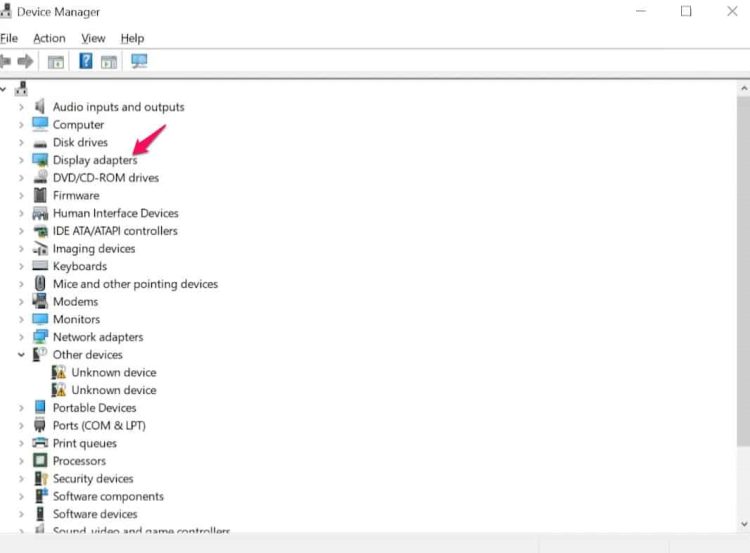
4 – Right-click the display adapters.
5 – Choose Properties.
6 – Go to the Driver Tab.
7 – Choose “Update Driver. ”
8 – Choose Automatically search for Driver Software.
9 – Wait for the update to be installed.
To find updated drivers, use the Windows Update search tool. If updating the drivers didn’t work, you may use Display Driver Uninstaller to remove the graphics driver fully, download the most recent driver, and install it on your Windows computer.
Modify Registry
As this is a registry process, it is urged that you take important safeguards by backing up the registry or setting up a system restore point. After you’re completed, move on as follows.
1 – Open start and enter Regedit.
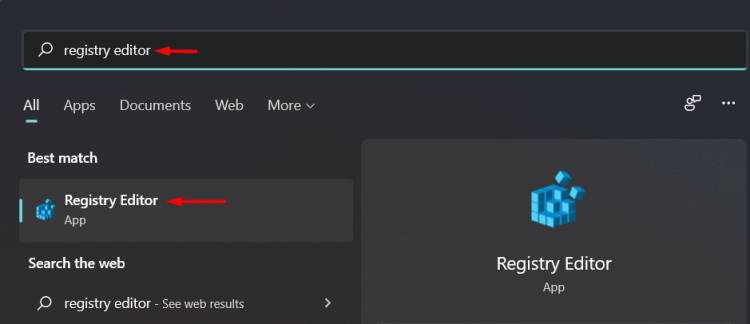
2 – Launch Regedit.
3 – Select yes.
4 – Expand HKEY_LOCAL_MACHINE.
5 – Expand System.
6 – Expand the Current Control Set.
7 – Expand Control.
8 – Choose Graphics Drivers.

9 – Right-click on the empty field on the right, select “New>,” and then “DWORD (32-bit) Value.”
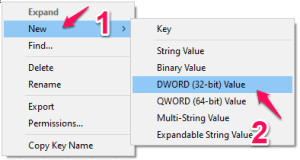
10 – Rename this key “TdrLevel.”
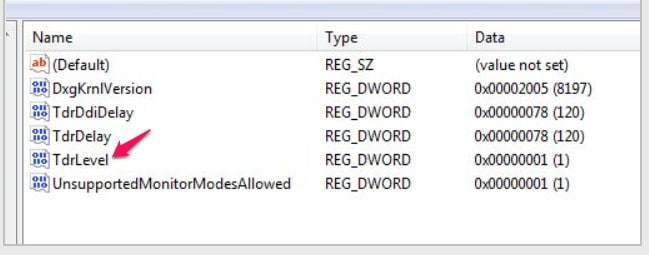
11 – To change the delay’s value, double-click on this key.
12 – Type “0” into the Edit DWORD (32-bit) Value window.
13 – Choose “OK.”
Close the Registry Editor window and restart your device to make this update effective. After restarting, you won’t encounter the DXGI ERROR DEVICE REMOVED issue again.
Turn Off Shadow Play
Most DXGI_ERROR_DEVICE_REMOVED error-affected consumers have NVIDIA graphics cards installed on their Windows laptops; on compatible systems, NVIDIA Shadow play is used to record in-game video. To find this solution, you must disable Shadow play. The procedure is as follows.
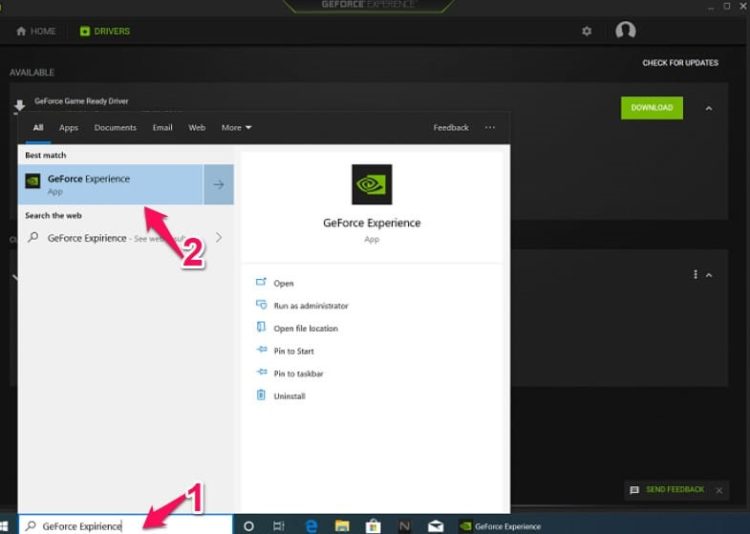
1 – Look for “GeForce Experience.”
2 – From the search results, choose “GeForce Experience.”
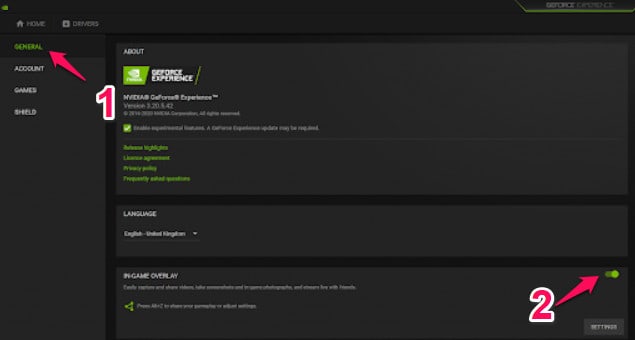
3 – In the GeForce Experience window, select the “General” tab.
4 – Turn off the “IN-OVER OVERLAY” settings.
5 – Close the GeForce Experience window.
Ensure the problem has been fixed. Go to the next option if you don’t want to.
Turn Off The Antialiasing Function
To improve the quality of the output display, graphics software typically employs the antialiasing technique. Unfortunately, some users complained that this functionality might cause the “DXGI error not now available” problem. You may disable it from the NVidia Control Panel in this case. To disable antialiasing on your Windows computer, follow these steps.
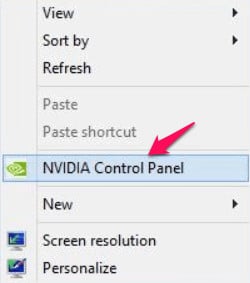
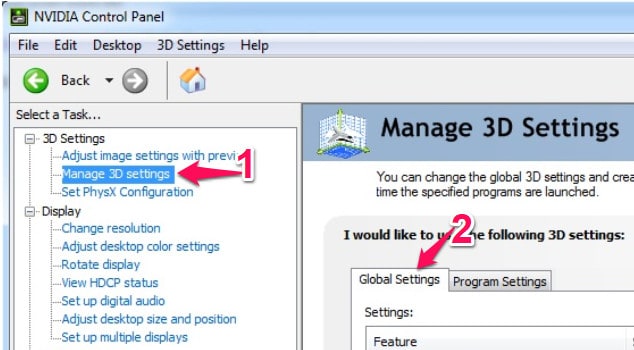
1 – Right-click a space on your desktop, then select NVidia Control Panel.
2 – Select “Manage 3D settings” on the left-hand side once the Control Panel appears.
3 – Choose “Global settings.”
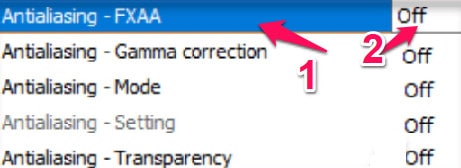
4 – You’ll view several “Antialiasing” features here.
5 – Choose “Off” under the “Antialiasing-FXAA” option.
6 – Set “Off” for all the “Antialiasing” options.
7 – To make these settings effective, click “Apply.”
8 – Exit the program. After restarting your computer, check if the DXGI ERROR DEVICE REMOVED issue remains.
Reinstall Graphics Adapter After Uninstalling It
1 – Press the Windows and X keys simultaneously on your keyboard.
2 – To go to the program, click “Device Manager.”
3 – When you see the list of drivers, expand “Display adapters.”
4 – To remove the driver from your PC, right-click on it and choose “Uninstall device.”
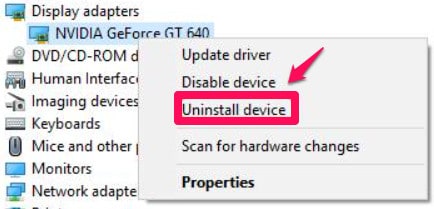
5 – If a confirmation window opens before uninstalling the graphics driver, click “Uninstall.”
6 – After removing the driver, restart your computer.
If you restart your computer, the driver will be reinstalled. Your problem should now be addressed.
Check Hardware Settings
Users conduct a range of everyday actions to keep their computers in excellent operating order, especially if they use them for graphically demanding tasks such as playing games or editing HD videos. Before you begin anything, complete the following activities or exams.
1 – Remove the dedicated graphics card from its slot and clean it.
2 – Keep the computer away from enclosed areas to improve ventilation.
3 – Set the GPU’s cooling to at least 70% to avoid overheating.
4 – Stop overclocking your graphics card.
5 – Your in-game settings should all be set to low.
Make sure your graphics meet the fundamental criteria of the game.
The Bottom Line:
This post aims to help you fix the DXGI_ERROR_DEVICE_REMOVED problem on Windows 10/11. We hope you find this technique beneficial. Have you been able to solve DXGI_ERROR_DEVICE_REMOVED? Let us know through the comments section below.


