
Fixing Error 0x80070026 during a Windows Update: Sometimes, when upgrading Windows, the error code 0x80070026 is shown. It’s nothing to be very concerned about, and one of the below methods should readily resolve the issue. Windows 10 users typically see the Windows update error number 80070026 while installing the most recent updates.
The fact that your C:Users folder was renamed to another directory, such as F:Users, causing potential system difficulties with the Windows Update function, might be the cause of this error number.
Fortunately, there are a few relatively simple ways to resolve error number 80070026 and restore normal operations. Simply follow the instructions outlined below in the sequence provided, and your operating system will be operational in no time.
How can I resolve error 0x80070026 with Windows Update?
1. Delete the contents of the Temp directory
1. Reboot the system.
2. Sign in using the administrator account.
3. Double-click the Users folder from the “C:” partition (or your primary disc) using the mouse.
4. Double-click the folder itnota.
5. Launch AppData, then navigate to Local.
6. Now, open the Temp folder and erase its contents.
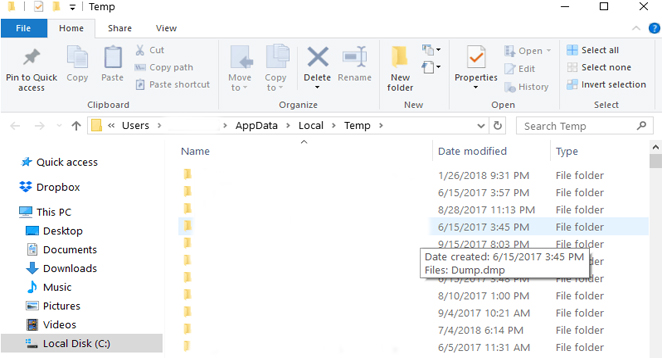
7. Essential data, such as files and folders, should be backed up before attempting the preceding procedures.
2. Copy the folder $$PendingFiles
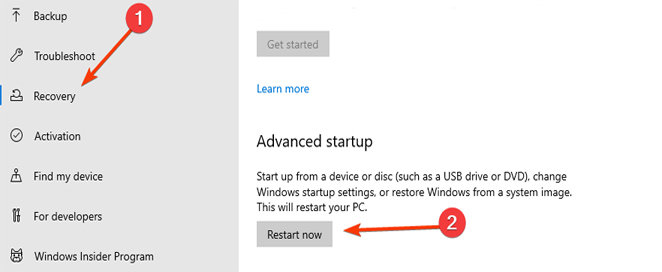
1. Open the Settings menu in Windows 10.
2. Update Updates and Security.
3. Under the Recovery tab, choose Advanced Startup.
4. Click the Restart button.
5. After the reboot, you should see a popup titled Select an option.
6. Choose Troubleshoot and then search for the Advanced options.
7. Next, press or click the Command Prompt icon.
8. Enter the following instruction and click Enter:
dir C:
9. Perform this procedure for each partition to discover which one is on the SSD or external hard drive and which is on the internal hard disc. Partition G will serve as the external hard drive, while partition H will serve as the internal hard drive.
10. Enter the following at the command prompt and click Enter:
robocopy /copyall /mir /xj G:$$PendingFiles H:$$PendingFiles
11. Execute the following and hit Enter again:
rmdir /S /Q G:$$PendingFiles
12. Launch the File Explorer and determine the letter assigned to the Internal HDD. (We should use C.)
13. Type the following into the command prompt (cmd) window and press Enter:
mklink /J G:$$PendingFiles C:$$PendingFiles
14. Exit Command Prompt and restart the system.
15. You must launch Windows Update when the device reboots and recheck to see whether the error code 80070026 persists.
Note: If some of the procedures for the second option are unavailable on your Windows 10 device, proceed to the next solution to fix Error 0x80070026 during a Windows Update.
3. Check your antivirus
Your antivirus regularly prevents you from upgrading your PC. To determine if your antivirus software is the problem, deactivate it briefly and click the Check for updates option.
Frequently, deactivating your antivirus will not be sufficient; you will need to delete it entirely. If this is effective, consider moving to a different option.
There are a plethora of helpful antivirus applications accessible, and many of them are developed with unique and intriguing features to meet the demands of each user.
4. Run DISM
1. In the search box, type cmd and launch as administrator.
2. Enter the following and then press Enter:
DISM.exe /Online /Cleanup-image /Scanhealth
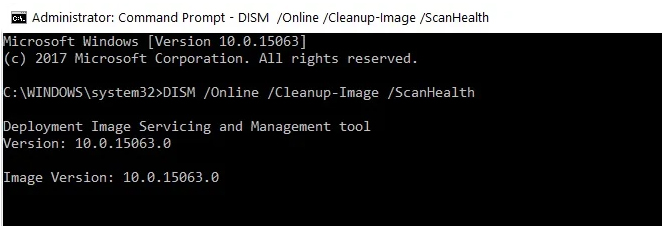
3. Execute the following command and click Enter:
DISM.exe /Online /Cleanup-image /Restorehealth
4. Exit and restart the operating system again.
Verify that Windows Update is operating appropriately.
5. Reset your computer
1. Use the second solution to access the Recovery menu.
2. In the Reset, this PC area, select the Get Started button.
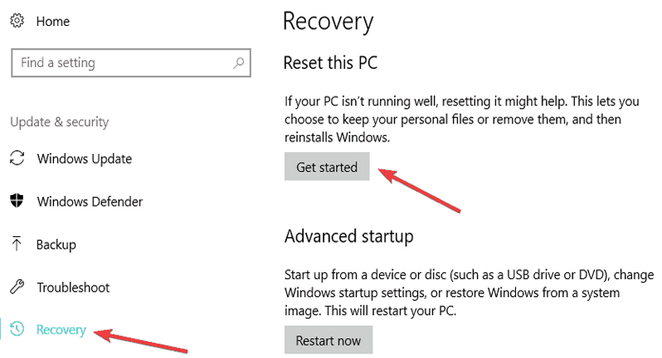
3. Follow the on-screen steps to complete the System Refresh, and then retry Windows Update to determine its status.
6. Run the Windows Update Diagnostic Tool
You can use Windows’ built-in update troubleshooter if the problem persists and you need a break from complex troubleshooting methods. This helpful application will assist you in resolving general update difficulties so that you may install the most recent OS upgrades on your computer.
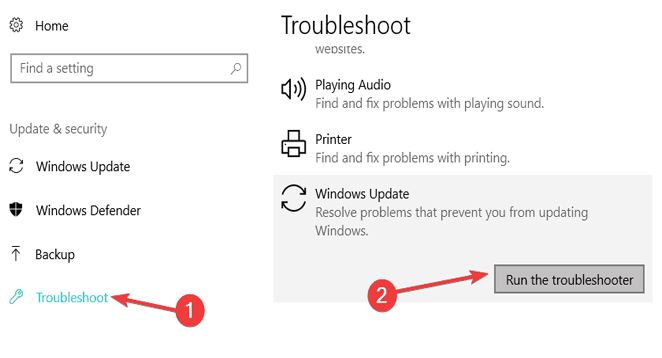
1. If you’re using Windows 10, navigate to Settings > Update & Security > Troubleshooter and launch the update troubleshooter, as depicted in the following image.
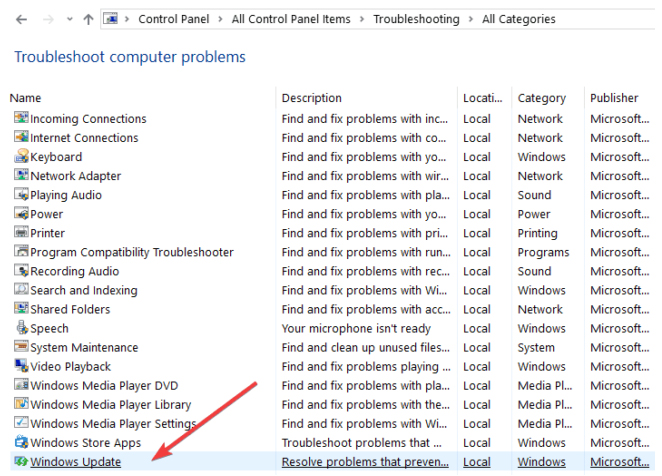
2. If you are running Windows 7 or 8.1, you may access the Update troubleshooter from the Control Panel.
3. In the Control Panel windows, enter troubleshoot, open the tool, and click View All to show all troubleshooting tools.
Then, find the Update troubleshooter and launch it.
7. Restore Windows Updates component settings
1. Relaunch Command Prompt as an administrator.
2. Stop Windows Update Services by inputting the following instructions and pressing the Enter key after each:
net stop wuauserv
net stop cryptSvc
net stop bits
net stop msiserver
3. Type the following commands to rename the SoftwareDistribution and Catroot2 directories:
Ren C:WindowssoftwareDistribution SoftwareDistribution.old
Ren C:WindowsSystem32catroot2 Catroot2.old
4. Type the following instructions to restart the Windows Update Services:
net start wuauserv
net start cryptSvc
net start bits
net start msiserver
5. Exit Command Prompt, restart your computer, and verify if the most recent updates can be installed. It may helps in fixing Error 0x80070026 appears during a Windows Update.
8. Install manual updates
If the Windows Update service continues to malfunction, manually apply the faulty updates. For instance, if you’re attempting to install the most recent device driver updates, visit the manufacturer’s website to obtain the updates. If you’re attempting to install the most recent Windows patches, visit Microsoft’s Update Catalog, input the KB number of the applicable update(s), and click Download.
Final Words
If you’ve followed the steps above correctly to fix Error 0x80070026 during a Windows Update, it should now work on your device. If you want more assistance, please get in touch with us in the comments part of the page located below, and we will respond as soon as possible.


