Best Ways to Fix Secure Boot Enabled But Not Active: This issue may have happened because your BIOS is outdated or because the Compatibility Support Module was activated. This article will explore all possible solutions and the root reasons for the problem. It can be not very clear if, on the System Information page, the Secure boot option is off, yet in BIOS, it is indicated as Active. However, it could be due to misconfigured BIOS settings and can be resolved with a few simple steps.
After reviewing the root causes of the problem, we will explore how to resolve it in this article. Let’s get started!
What causes the Secure Boot to be enabled but not an active issue?
There are active reasons why secure boot may not be enabled on your machine; some of them are listed below:
1. Secure Boot feature disabled
Verify that the Secure Boot option in the UEFI firmware settings is set to Disable; the feature will not function even if technically enabled. Therefore, double-check the BIOS settings for accuracy.
2. CSM enabled
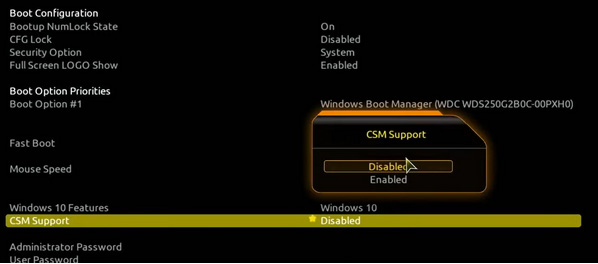
If the Compatibility Support Module (CSM) is enabled in the UEFI settings, secure boot is not an active issue. Therefore, to obtain the Secure boot option, you should disable it instead.
3. BIOS is outdated
If the BIOS is not up-to-date, it may not support Secure boot. Instead, download and install BIOS upgrades from the manufacturer’s website to enable the feature.
4. Scan for viruses
If your laptop is infected with malware or viruses, an error may appear when the secure boot is not active. It would help if you scanned for malware using a security tool.
What to do if Secure Boot is Enabled but not Active?
Before proceeding with actual troubleshooting measures, perform the following preparatory checks:
- Analyze Windows updates
- The secure boot must be configured on the operating system.
- Your device’s Secure boot signature must be valid.
1. Update BIOS
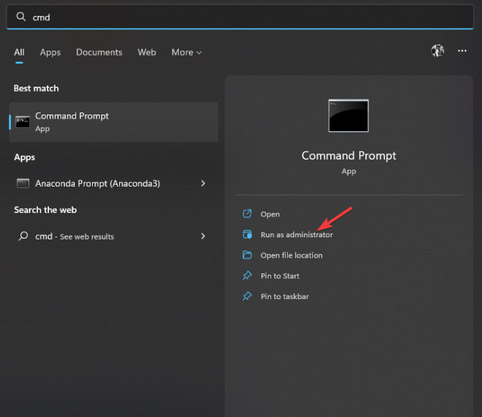
1. Press the Windows key, type CMD, and click the Run as administrator button.
2. Enter the following command to determine the version of the BIOS and hit Enter:
wmic bios get smbiosbiosversion
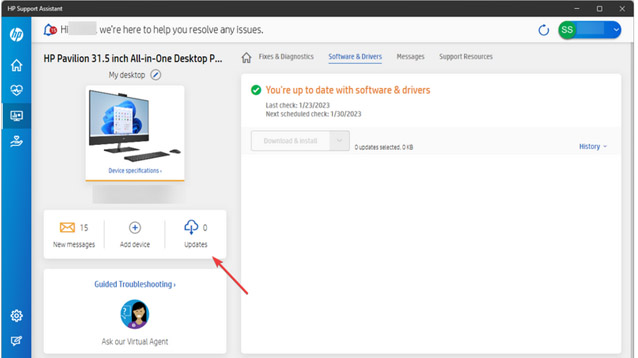
3. Next, open the device manufacturer’s website or, if available, the manufacturer’s helper app. To show, we are using the HP Support Assistant tool.
4. Launch the app. Click Check for updates in the Updates section.
5. If a BIOS update is available, download and install it.
2. Disable CSM
1. Windows + I will open the Settings menu.
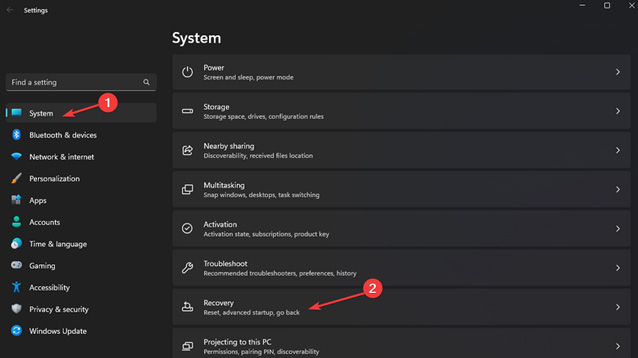
2. Select System, then Recovery.
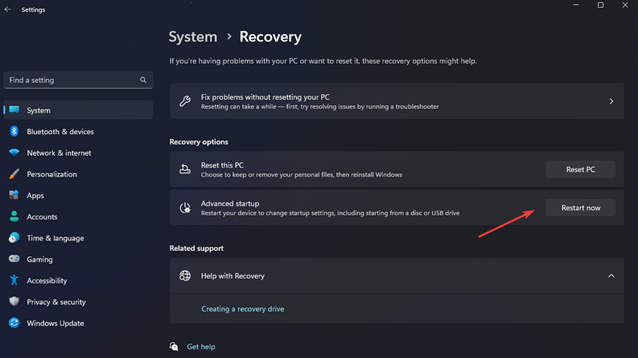
3. Click Restart now under Advanced Startup.
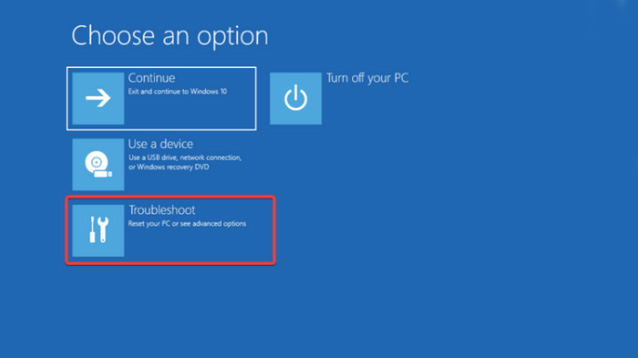
4. Select Troubleshooting from the Choose an option menu.
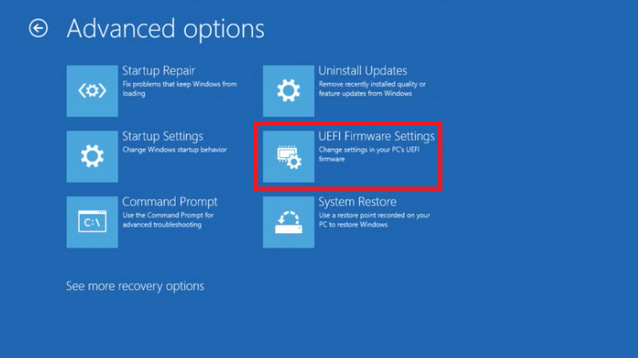
5. Choose Advanced Options now.
6. In the panel titled Advanced Options, select UEFI Firmware Settings.
7. Click Restart.
8. The computer will restart and provide several options. First, select the right choice to access the BIOS.
9. Select CSM and then choose Disable on the Boot or Security tabs.
10. Now, navigate to the Exit tab and pick Save and exit.
3. Change the platform
1. Enter BIOS mode using the procedure described in the preceding section.
2. Navigate to System Mode and choose User rather than Setup.
3. Now locate Secure Boot Mode, and if Standard is selected, pick Custom.
4. Change it back to the Standard format.
5. Now, navigate to the Exit tab and pick Save and exit.
4. Enable Secure Boot properly
1. Enter the BIOS again using the manner described in procedure 2
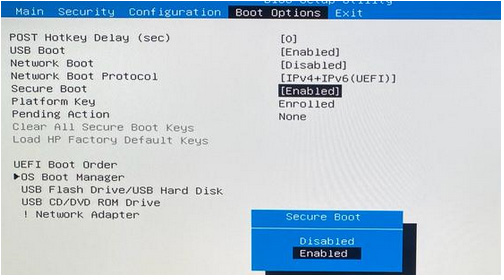
2. Choose Secure boot from the Boot menu or the Security menu.
3. Choose Enabled. Now, navigate to the Exit tab and pick Save and exit.
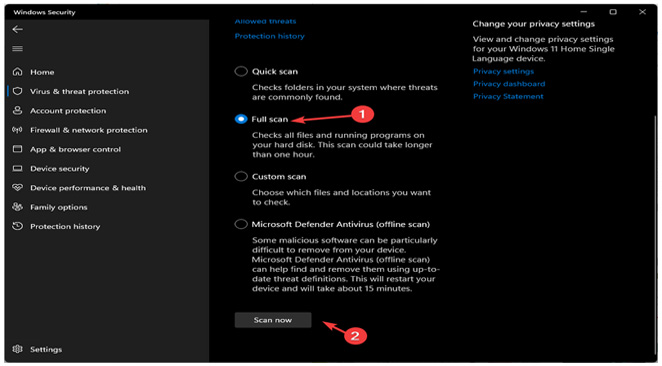
5. Scan your computer for malware
1. Press the Windows key, type Windows Security, and then press the Open button.
2. Select Scan options under Virus & threat protection.
3. Now select Full Scan, followed by Scan now.
4. Once the Scan has concluded, remove all harmful files discovered.
Final Words
Follow these procedures to resolve the secure boot enabled but not active issue. Then, try these strategies and let us know in the comments section which one works for you.

